A good way of seeing some of the features of ChronoClock is to run the demos.
From the main menu bar, select view, then select demo.
From here you are given the choice of starting a clock, timer, stopwatch or alarm demo. Not all the features of ChronoClock are displayed by the demos, but this should help you imagine how you might customize your clocks.
When the application ChronoClock first opens the user is presented with an array of buttons. Each button will start a timepiece (clock, timer, stopwatch or alarm). The left-hand column are the standard configuration. The right-hand collection can be modified by the user.
Click on . This will launch a standard clock and the control panel for that clock.
Clock Control Panel with Settings tab
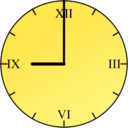
Standard Clock
From this point on you can customize the clock as you wish.
The user can change it to a different style by clicking on or .
By clicking on the you can will have access to a large number of parameters which the user can modify.
Clock Control Panel with Customize tab
The rest of this manual will describe functions available and the parameters which the user can control.
The First Panel has two sets of buttons. The buttons on the left will launch the Standard timepieces: the standard clock, the standard timer, the standard stopwatch and the standard alarm. They all function well, but you may be interested in customizing timepieces to your own taste.
The buttons on the right are the customized timepieces. ChronoClock starts with a set, but we expect that you will want to create your own. Timepieces you create will show up here.
You can also delete a customized timepiece by using the . Be carful. Once a clock is gone -- it is really gone. However, you can always recover the original set ("factory settings") of customized timepieces with the restore menu item, described below.
The main menu allows you to set some general feature of ChronoClock or access information.
ChronoClock > About Chrono
Brief identifying information about ChronoClock
File > Restore
This will erase all the customized timepieces listed on the right of the First Panel and replace them with the original set ("factory settings"). A warning is issued before the customized timepieces are erased.
View > Demo starts the demo mode. A sample timepiece is displayed and some feature is changed every second.
View > Demo > Clock - Start Clock demo
View > Demo > Timer - Start Timer demo
View > Demo > Stopwatch - Start Stopwatch demo
View > Demo > Alarm - Start Alarm demo
Window > Always Top Layer
If this is checked, your timepieces are always on top of all the clutter on your Desktop.
Window > On All Desktops
If this is checked, your timepieces will appear on all desktops.
Help > Chrono Help
Points to this website and information.
To start a clock, to tell time, simple click on on the first panel. The standard clock and the clock control panel will appear.
The control panel for all timepieces have two tab: Settings and Customize. The Customize tab gives you access to customizing the sounds and appearance of that timepiece, and is further explained in the Customize section below.
Clock Settings
The left-hand set of buttons allows you to pick a clock "style". Styles include: Analog, Digital and Sundial.
The middle set of radio-buttons allow you to set the way the time is set:
system time Uses the clock on your computer.
time zone You can display time in a different time zone. This assumes that your system time and timezone is correct. The time zone is set with the pull-down menu to the right.
offset You can set you clock to be exactly hh:mm:ss offset from the system time. The amount is set in the 0:00:00 fields to the right.
absolute You can set your clock to a particular time. The time is set at the moment your push the "absolute" button.
To start a timer, simple click on on the first panel. The standard timer and the timer control panel will appear.
The style and time can be set on this tab. To customize the sound and appearance, see the Customize section below.
The analog clock spirals to zero, one spiral is one minute near the end, but longer when the time is great. The digital clocks simple counts down. The hourglass drains sand.
Timer Settings
style The left-hand set of buttons allows you to pick a clock "style". Styles include: Analog, Digital and Hourglass.
Time: This field allows you the set the time hh:mm:ss.
Select the type of alarm:
alarm: Select an alarm. The particular alarm can be set with Customize > Audio .
verbal message: You can type enter a message which will be read out load to you. The voice is set with System Preferences and not ChronoClock.
actually start, stop and reset the timer. & can also be done with the [space-bar], and with the [enter/return] key.
To start a stopwatch, simple click on on the first panel. The standard stopwatch and the stopwatch control panel will appear.
The style of the stopwatch can be set on this tab. To customize the appearance, see the Customize section below.
The stopwatch can also take multiple splits. On the analog stopwatch, slits are displayed as red hands. On the digital stopwatch they appear in the second time field. When the watch is stopped, a strip is generated which reports all the slips as well as the final time.
The buttons, and alternates keys, which control the stopwatch are:
alternate: [space bar] - to start the stopwatch
alternate: [space bar] - to stop the stopwatch
alternate: [enter/return] - to take a split
alternate: [enter/return] - to reset the stopwatch
Additional control and information can be obtained via the Face Mini Menu. Click (or right-click) on the face of the clock and a small menu will appear.
resize frame A frame will appear which you can use to resize the timepiece.
close/delete Close and delete this timepiece.
help Some information about alternate keys.
open control Open this timepieces's control panel.
/./... Sets the number of tick marks on analog clock faces
Opens the font selection panel. Note: ChronoClock selects a font size to fit the size of the face and ignores the font size you might enter here. The button displays the name of the font, for example
radial# / horz# Radial numbers have their bottom oriented towards the center of the clock. Horizontal numbers are always horizontal.
/ XII / 12 Select: no number / Roman Numerals / Arabic Numerals
3,6,9,12 / 1...12 Select display only 3,6,9,12 vs. display all numbers
2x (analog stopwatch only) One complete sweep of the second hand can be 30 seconds (twice as fast, so 2x). This is the traditional configuration of a stopwatch.
At the bottom of all Customize tabs is a button and a name field. When you have configured a timepiece the way you like it, you can click here and save it.
If the name is the same as a previous timepiece, it will overwrite that configuration. However, it will not overwrite the "standard" configurations.
The new timepiece will appear the first panel on the right-hand side, on top of the list. It will also show an icon which is a copy of that timepiece at the moment you saved it.